📦 Pick & Pack Process Documentation
📦 Pick & Pack Process Documentation
Overview
The Pick & Pack Process is a crucial part of the post-shipping operation workflow. After an order is successfully assigned to a courier, scheduled for pickup, and its label is generated, the order enters the Uttpatang Order > All Orders section. From here, warehouse staff can begin the systematic picking, scanning, packing, and label printing process for order dispatch.
This document outlines each step in the Pick & Pack process with detailed instructions and expected outcomes.
🔹 Step 1: Generate Active Pick List
Once your orders are ready:
- Navigate to:
Orders > Pick - Here, you will see a combined list of all unpicked orders.
- Click the “Active Pick List” button to generate a Pickup Number.
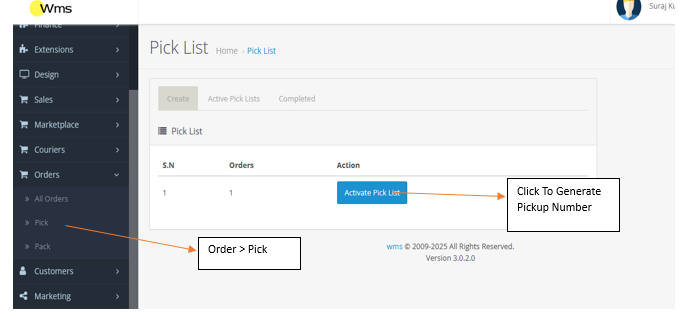
✅ This Pickup Number groups multiple orders together for batch processing.
🔹 Step 2: View Active Pick List Orders
- Go to:
Orders > Pick > Active Pick List - You will see a table of generated Pickup Numbers.
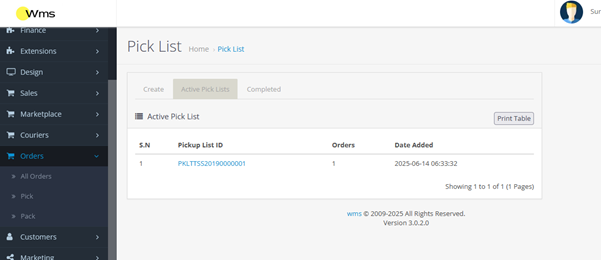
- Click on any Pickup Number to view all associated order details.
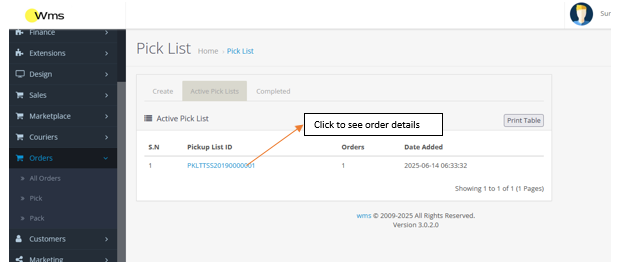
📦 This includes customer name, order ID, SKUs, and quantity for each order.
🔹 Step 3: Begin Packing with Pickup Number
- Go to:
Orders > Pack - You’ll find an input field labeled “Enter Pickup Number”.
- Enter the Pickup Number generated in Step 1 and click Submit.
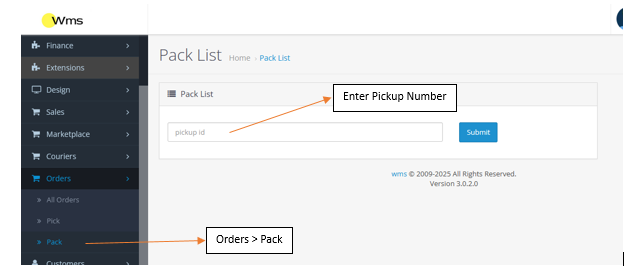
✅ This will filter and display only those orders tied to the specific Pickup Number for packing.
🔹 Step 4: Scan and Pack Products by SKU
- After entering the Pickup Number, a new input field appears:
“Enter Product SKU”
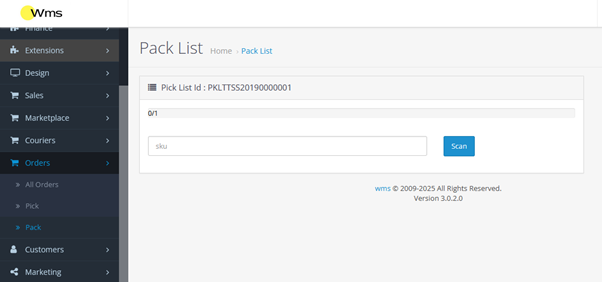
- For each order, scan or manually enter the SKU of the product being packed and click Submit.
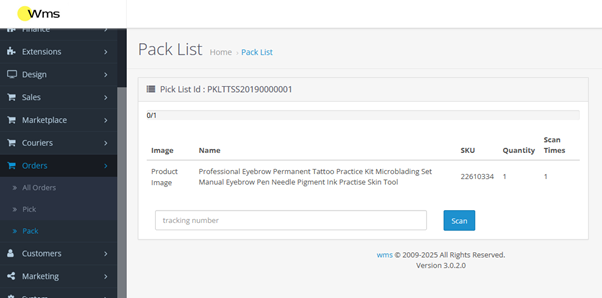
- After submission, the following product details will be displayed:
- Product Image
- Quantity to be packed
- Product Scan Time
- Status of scan progress
- 🔁 Continue scanning the same SKU multiple times until the total scanned quantity matches the order quantity.
- ✅ Once one product is fully scanned, proceed to the next SKU in the same order (if applicable).
- 📎 After all SKUs for the order are scanned, a shipping label (PDF format) will automatically be generated and shown on-screen.
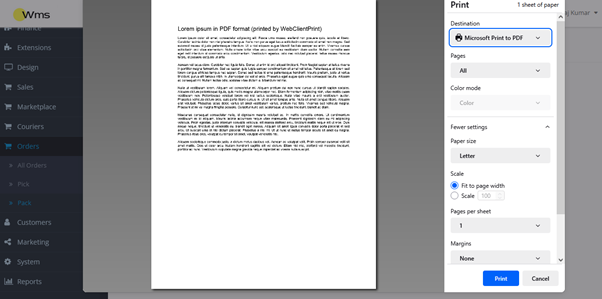
- Print the label and:
- Attach it to the package
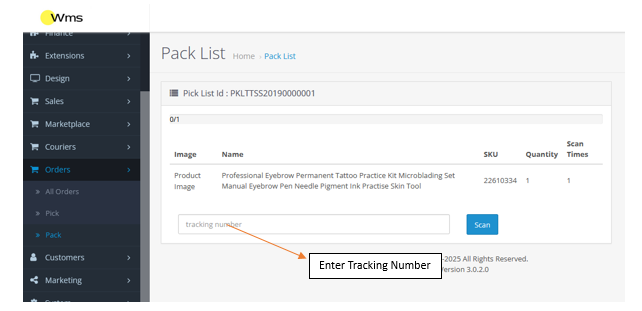
- Enter the courier tracking number
- Click Submit to finalize the order
- The system will now move to the next order in the Pickup Batch.
📦 Repeat this process for each order in the batch until all are completed.
🔹 Step 5: Review Completed Picked Orders
- Navigate to:
Orders > Pick > Complete - You will see a table showing all completed and scanned orders.
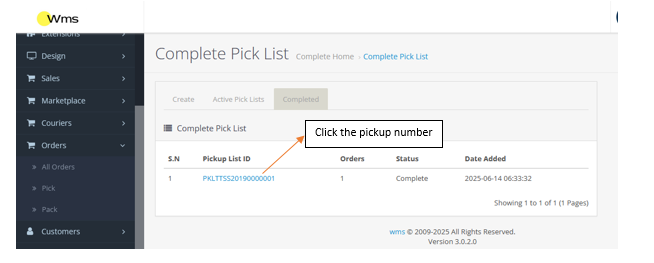
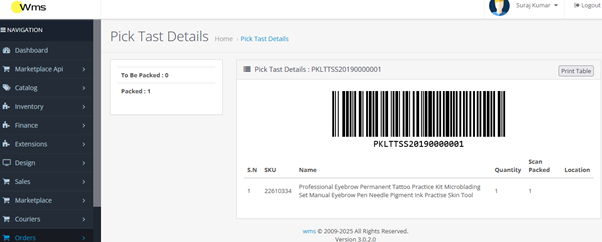
- Click on any Pickup List ID to:
- View all orders and product details under that pickup number
- Track which products were packed
- Review scan time and accuracy
- 🖨️ Above the table, there’s a Print button to:
- Print the entire order summary for documentation
- Use it as a physical checklist or dispatch record
📝 Notes and Best Practices
- 📌 Ensure accurate SKU scanning — incorrect entries can delay dispatch or lead to fulfillment errors.
- ✅ Labels will only be generated after all products in the order are scanned completely.
- 🛑 Do not skip product scan steps – this ensures quality control and inventory accuracy.
- 🔐 Tracking numbers must be entered before order completion to enable real-time logistics updates.
✅ Summary Workflow
| Step | Action |
| 1 | Generate Pickup Number from Orders > Pick |
| 2 | View orders in Orders > Pick > Active Pick List |
| 3 | Input Pickup Number in Orders > Pack |
| 4 | Scan each product SKU, complete packing, print label, and submit tracking |
| 5 | Review completed scans in Orders > Pick > Complete and print summary |
📞 Need Support?
If you encounter issues during the Pick & Pack process, contact the warehouse operations team or technical support.
- 📧 Email: support@utttpatang.com
- 📞 Phone: +91-XXXXXXXXXX