Orders Section
Orders Section – Documentation
This document provides a detailed walkthrough of the Orders Section in the sales module, including how to navigate, filter, view, and manage orders.
Step 1: Accessing the Orders Section
Navigation:
To begin, navigate to:
Sales > Orders
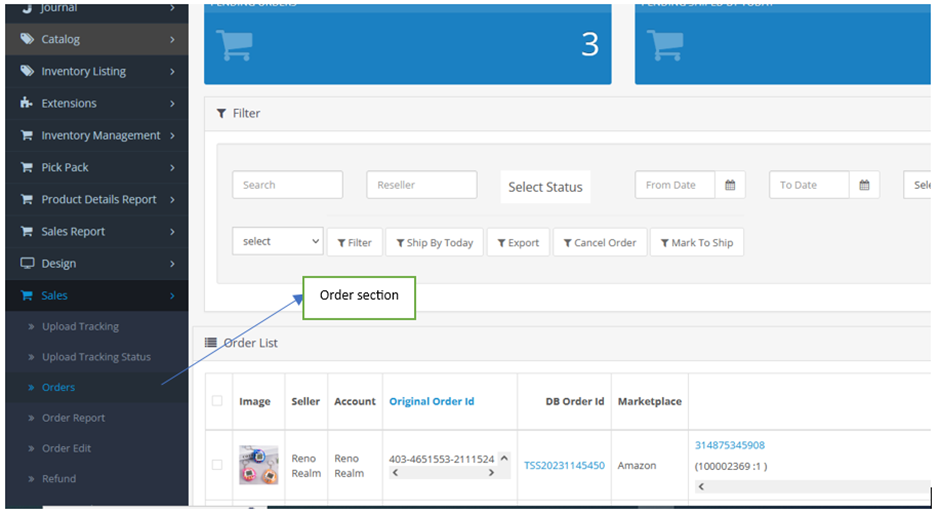
Overview of the Orders Page:
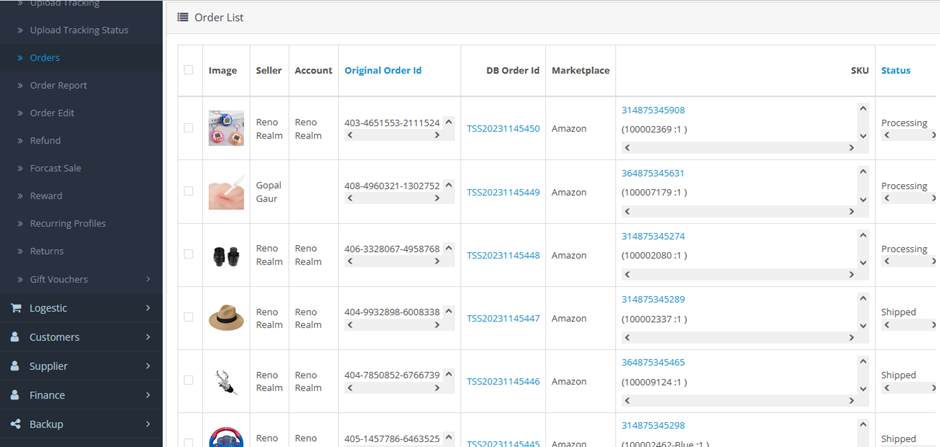
Once you’re on the Orders page, you’ll find a comprehensive table displaying all orders with key statuses such as:
- Pending
- Abnormal
- Shipped
- Cancelled (if applicable)
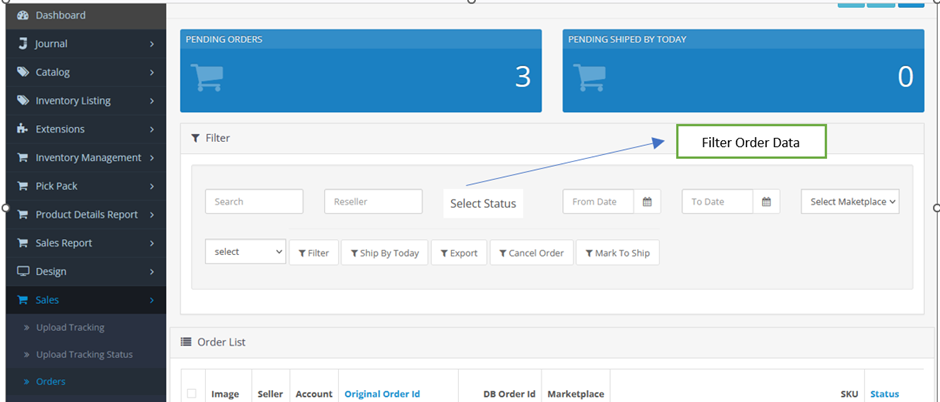
Top Summary Section:
Above the orders table, there is a summary section that displays:
- Total count of today’s Pending Orders
- Pending Shipped Orders for Today
These metrics provide a quick snapshot of current order handling priorities.
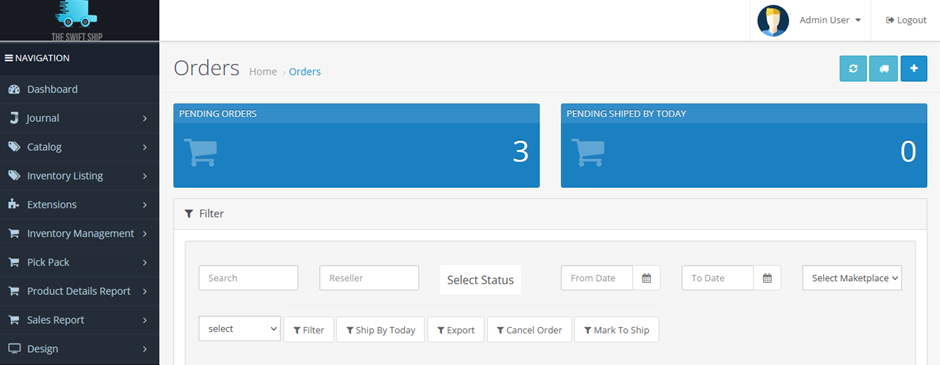
Filtering and Searching:
Beneath the orders table, you’ll find a powerful filter section that allows you to search and narrow down specific orders based on:
- Order Status
- Order Date or Time Range
- Specific Order ID
- Customer Information
This ensures efficient order tracking and management.
Step 2: Viewing and Managing Specific Order Details
Accessing Order Details:
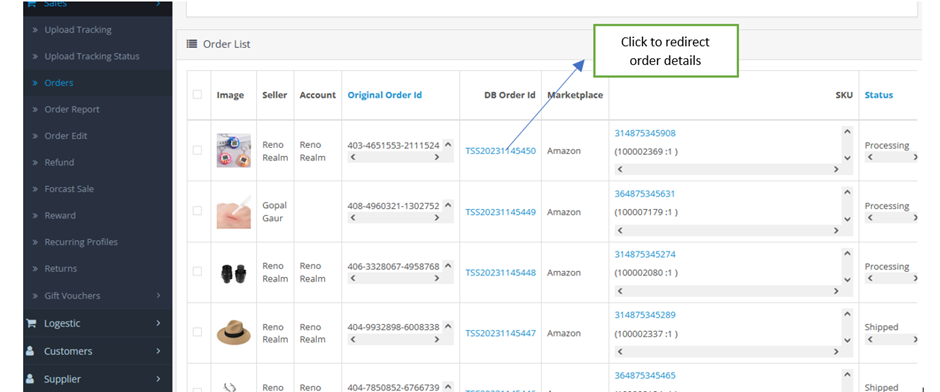
In the “DB Order ID” column of the table, click any order ID. You will be redirected to the Order Details Page.
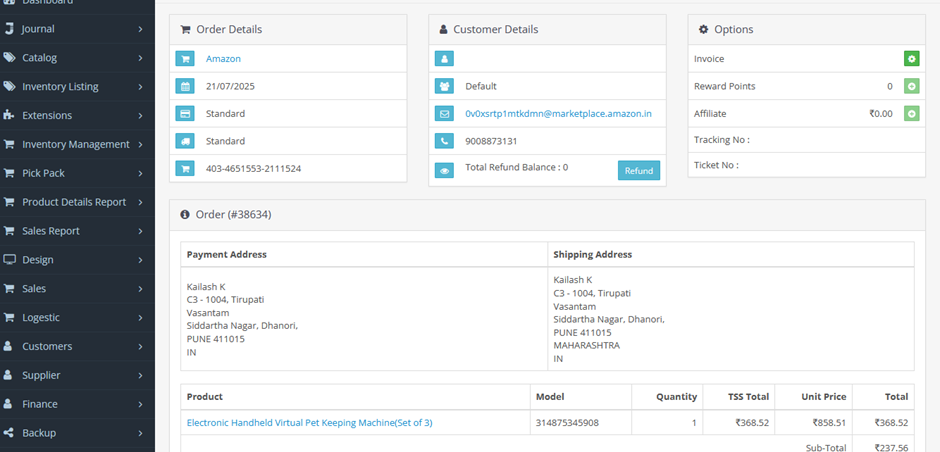
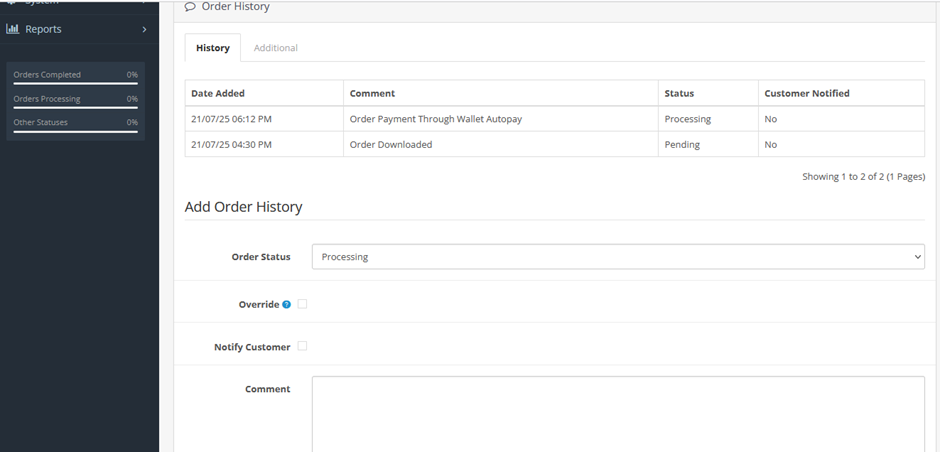
Order Details Page Features:
On this page, you can:
- View full details of the order
- Change the status of the order
- Add or update comments
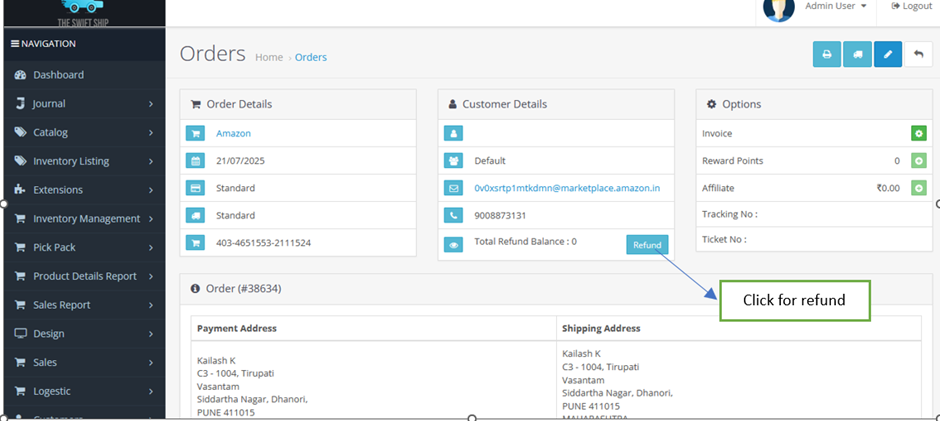
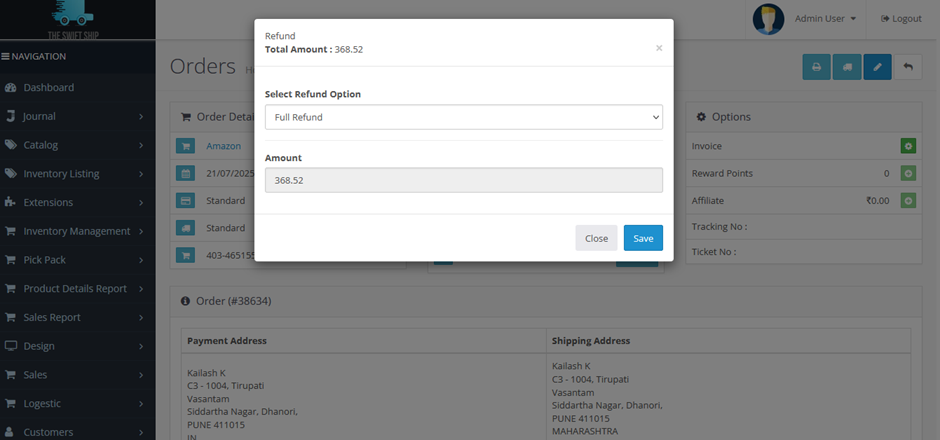
Refund Option:
At the top of this page:
- Click the “Refund” button.
- A modal form will pop up.
- Enter the refund amount and submit.
- The refund details are saved into the database for future reference.
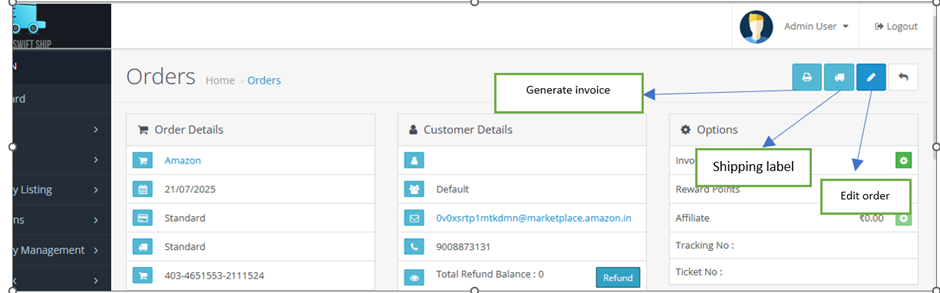
Editing the Order:
To make modifications:
- Click the “Edit” button at the top-right corner of the page.
- You can update order details like shipping address, items, quantities, etc.
Additional Actions:
- Create Invoice
- Generate Shipping Label
These actions are also available from the top-right section of the Order Details Page.
Step 3: Product Page Access via SKU
In the SKU column of the orders table:
- Click any SKU value.
- You will be redirected to the main website product page corresponding to that SKU.
This helps in quickly referencing the product details or verifying listings.
Step 4: Managing Shipping Information
In the column labeled “Last Mile Tracking Number”:
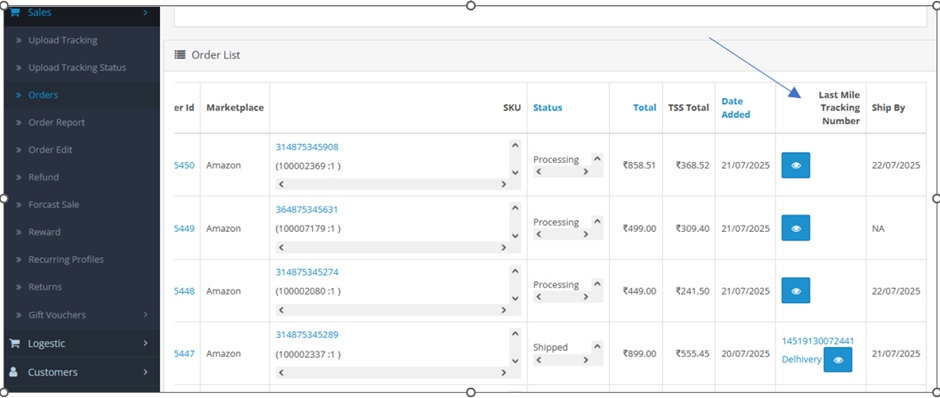
- Click the eye icon.
- A modal form will appear.
- In this form, you can:
- Select the shipping method (e.g., ExpressBee, Bluedart, etc.)
- Enter the tracking number associated with the order
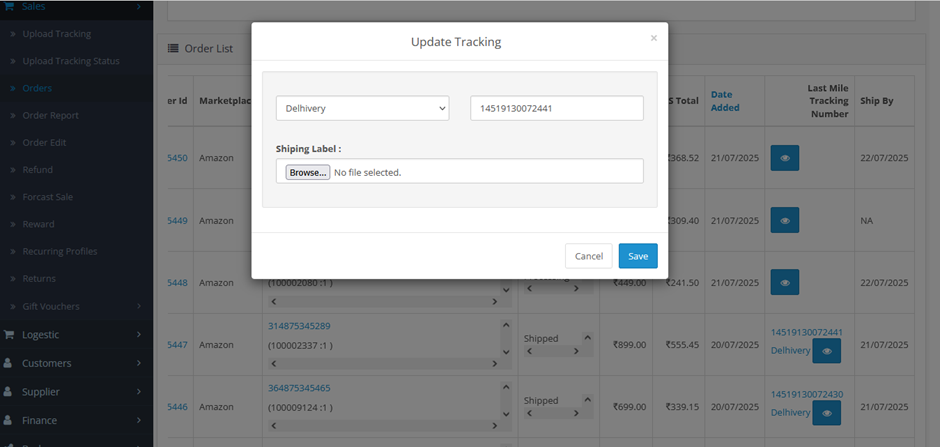
Once submitted, the shipping method and tracking number will be saved in the database.
Step 5: Manually Creating a New Order
To manually create a new order:
- Click the plus icon (➕) located at the top-right corner of the Orders section.
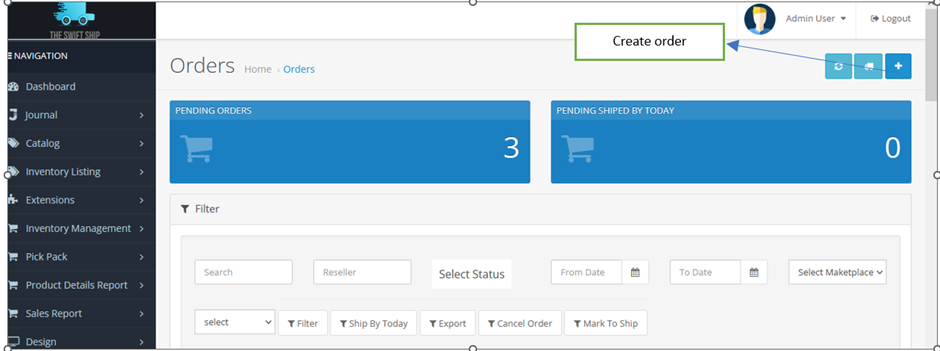
- This will open a form to create a new order manually, including details like:
- Customer Info
- Products
- Shipping and Payment Methods
Once completed, the order is saved and appears in the orders table for management.
Conclusion
The Orders Section is a robust interface for managing every aspect of your order processing lifecycle—from filtering and tracking to refunds and manual entry. With intuitive controls and direct links to detailed pages, it ensures streamlined order management and operational efficiency.